


This guide will show you how to use Launch X431 ECU & TCU Programmer to perform Mercedes-Benz DSM module replacement in bench mode.
Preparation:
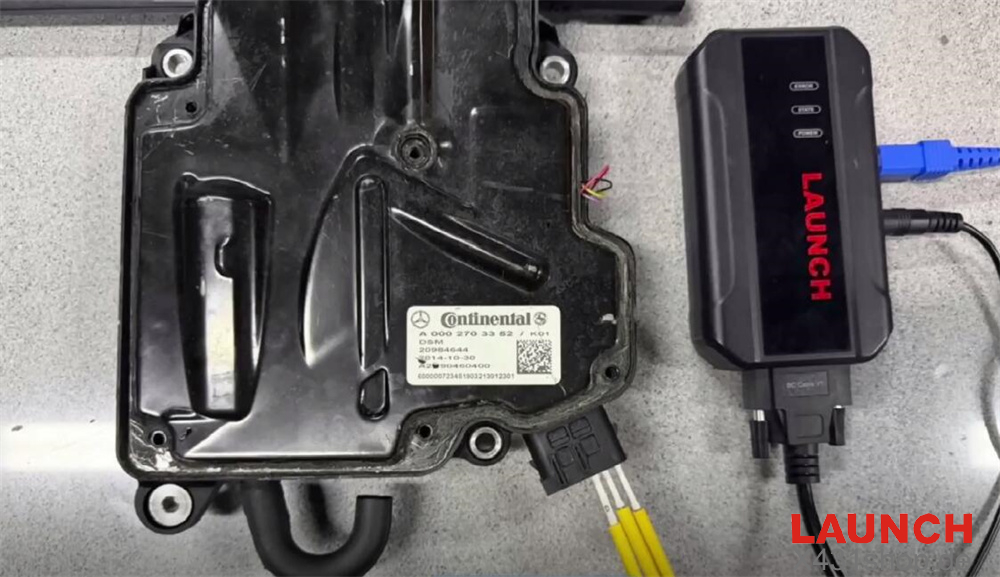
Original Mercedes-Benz DSM module
New Mercedes-Benz DSM module
Launch X431 ECU & TCU Programmer
A PC/computer
(No X431 tablet required)
Procedure:
1. Ensure X431 ECU & TCU Programmer PC software is updated to version V10.52 or higher.
2. Connect the X431 ECU Programmer to the PC and launch the software.
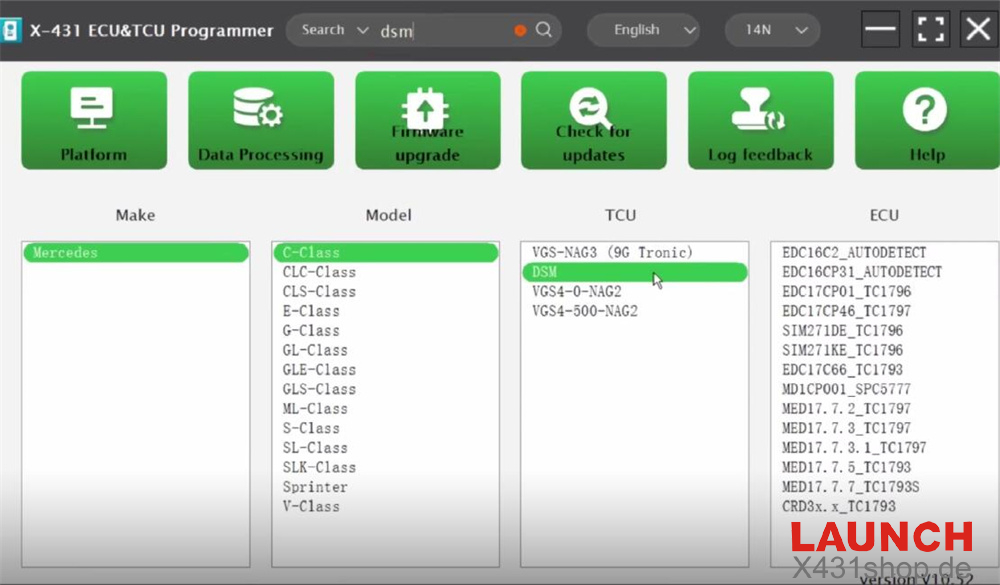
3. Type “dsm” in the search box to quickly locate the corresponding model (e.g., Mercedes C-Class DSM).
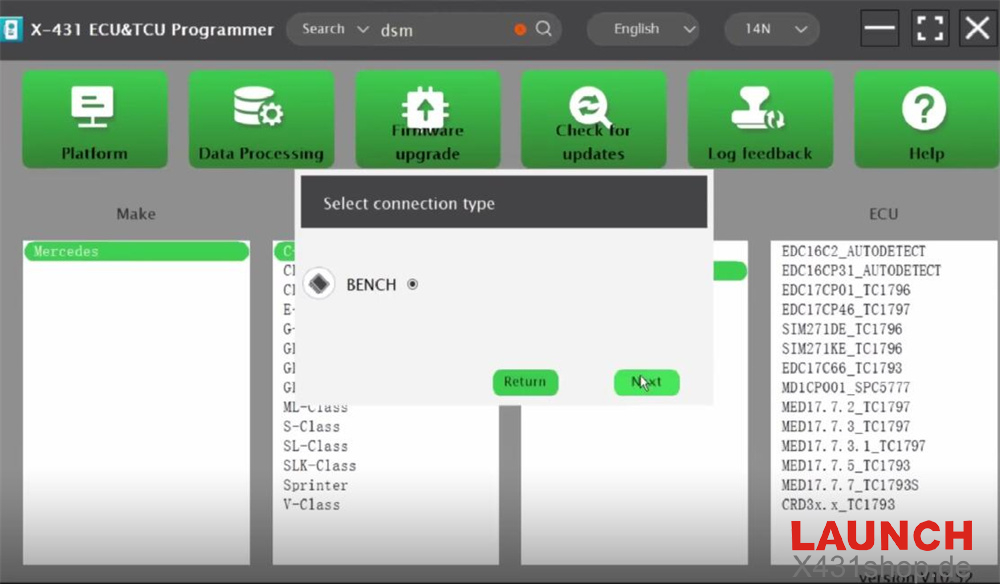
4. Select “BENCH” as the connection type.
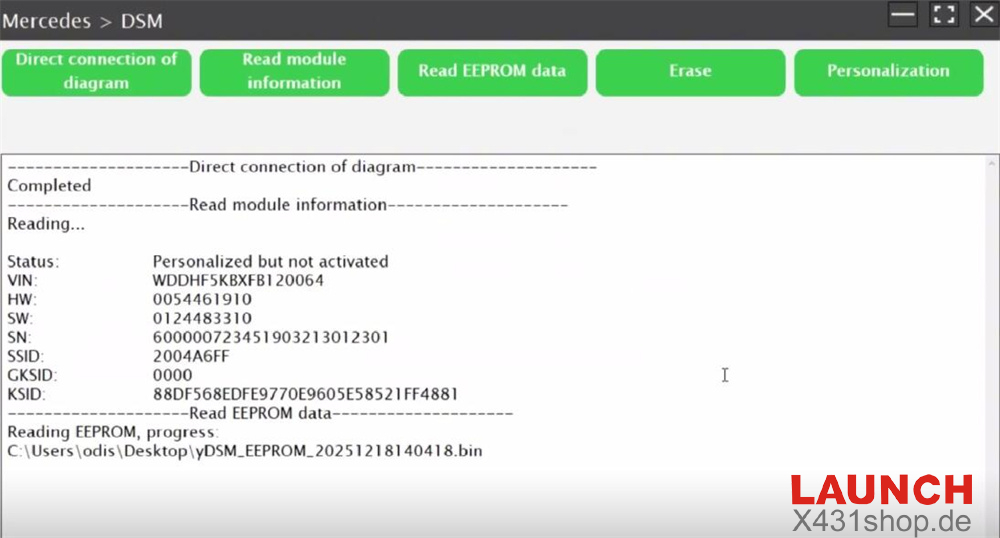
5. Follow the wiring diagram displayed to correctly connect the X-431 ECU Programmer to the original Mercedes-Benz DSM:
Black wire = Pin 10 – GND
Red wire = Pin 1 – VCC
Yellow wire = Pin 9 – CANH
Blue wire = Pin 6 – CANL
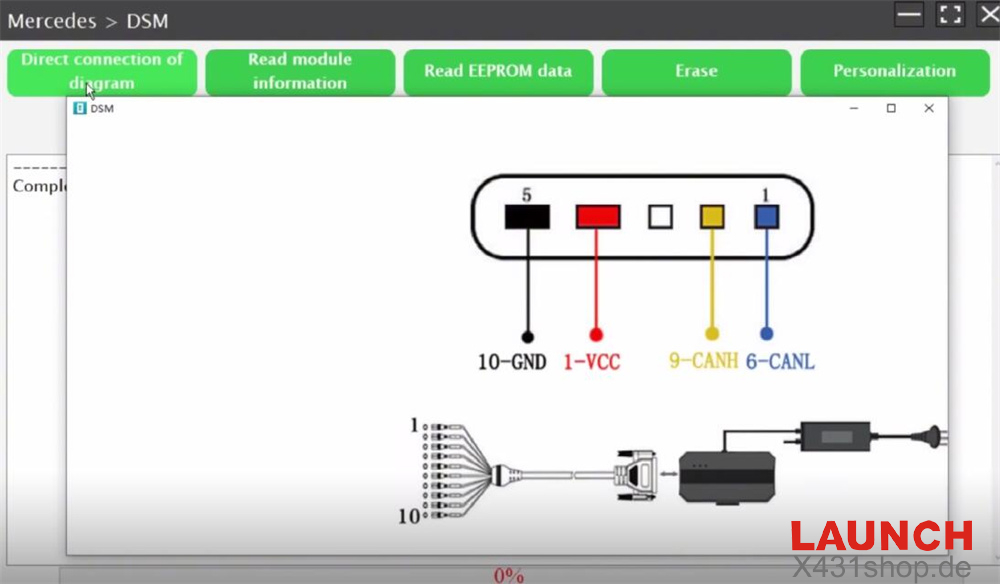
Remember to connect a stable power supply to the X431 ECU Programmer as well.
6. Read the module information and EEPROM data from the original DSM separately.
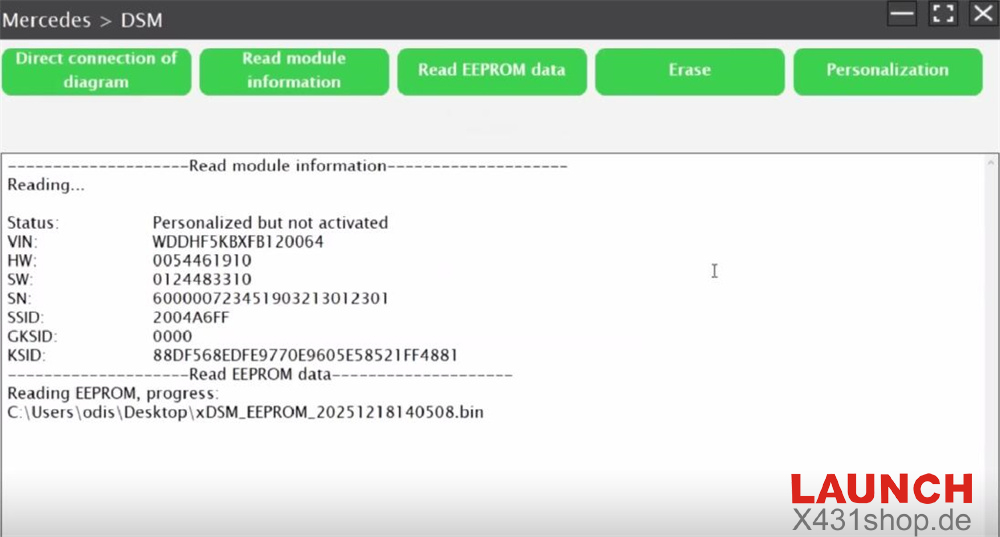
7. After reading is complete, disconnect the original DSM and connect the new DSM module using the same wiring.
8. Read the module information and EEPROM data from the new DSM.
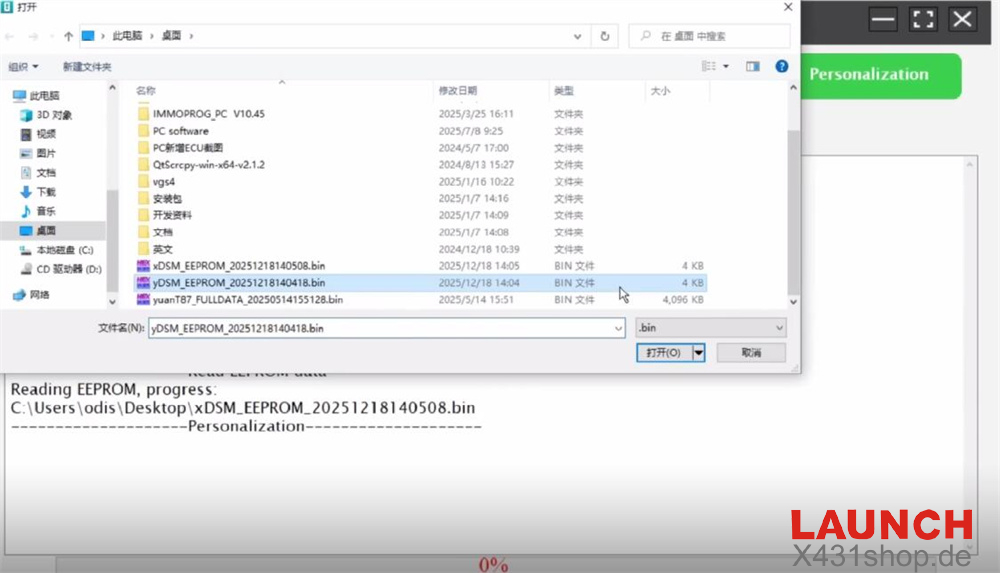
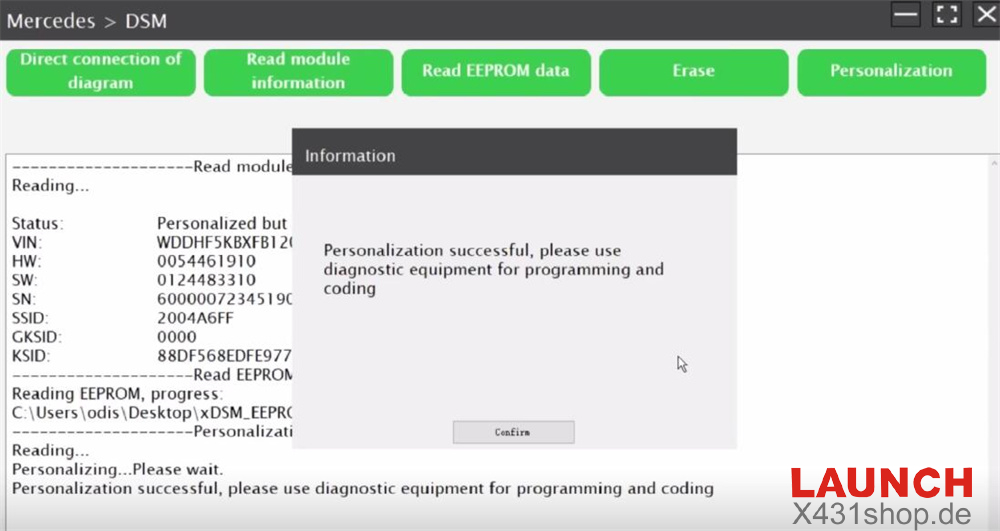
9. Click “Personalization” and select the EEPROM data saved from the original DSM to write it into the new DSM.
10. Once personalization is successful, the new DSM still needs to be programmed and adapted online using a diagnostic tool.
Video Guide: