


In our previous article, we covered the key features of the Launch CR HD V2 heavy-duty diagnostic tool.
Now, let’s dive into a detailed, step-by-step tutorial on how to get started and use it effectively.
The Launch CR HD V2 supports three languages (English, French, and Spanish) with lifetime free software updates.
PART ONE: Updating Launch CR HD V2 Software
1. Download the Launch Update Tool
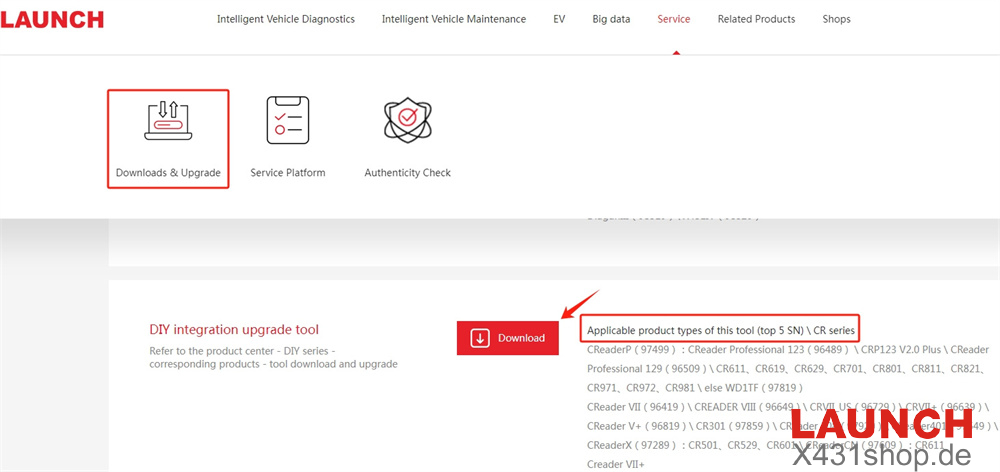
Visit https://en.cnlaunch.com/download/
Navigate to Service → Downloads & Upgrade → DIY integration upgrade tool → Download
2. Install the Update Tool
Follow the on-screen prompts for a simple installation.

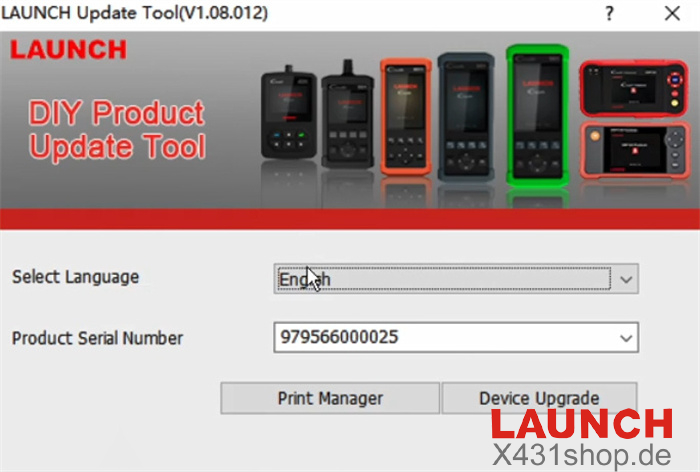
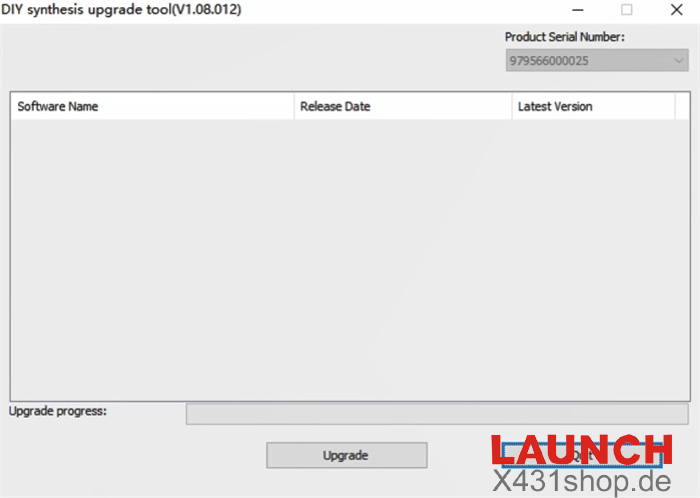
3. Configure the Update Tool
Choose your preferred language (English by default)
Enter the device serial number
Select the function: Print Manager or Device Upgrade
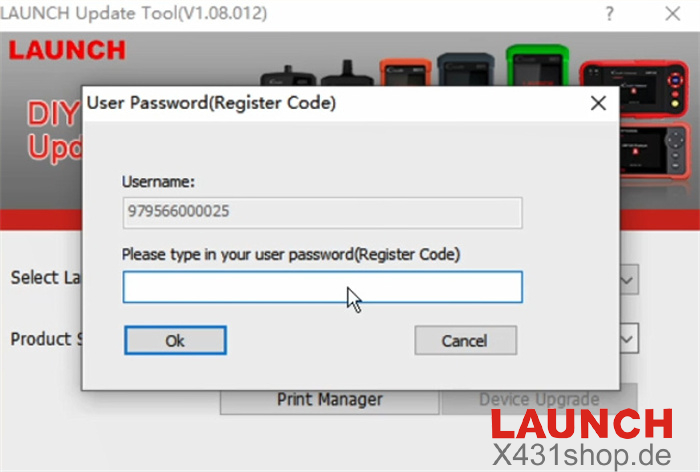
4. Enter the Register Code
Find the register code on the device: Main Function → Info → Register Code
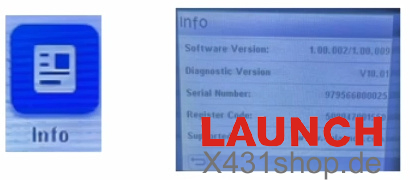
Input this code into the user password field of the Update Tool.
5. Perform the Software Update
Available updates will be displayed. Click “Upgrade” to install them.
If no updates are shown, your software is already up to date.
PART TWO: Connecting the Launch CR HD V2 Diagnostic Tool
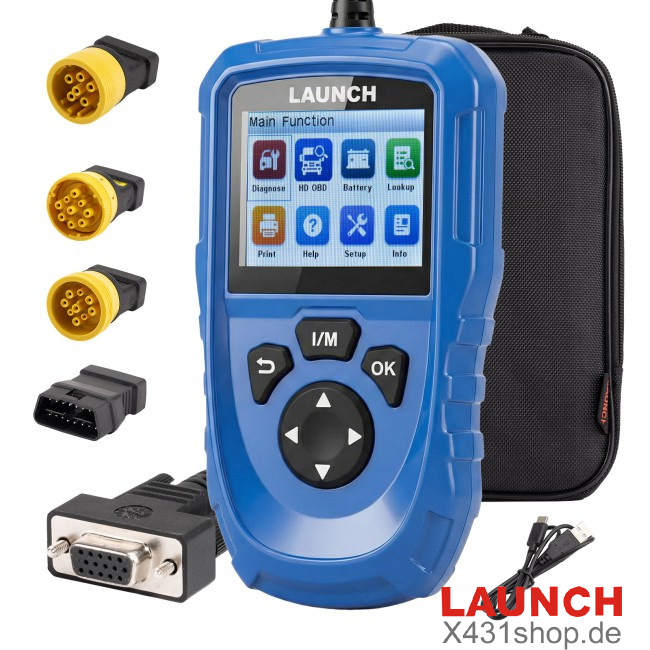
1. Package Contents
1× Main unit with diagnostic cables (3-row DB15 female connectors, 1.5m cable)
1× OBD6 connector
1× OBD9 connector
1× CT9 connector
1× Adapter connector
1× USB power cable
1× Quick Start Guide
1× Cloth bag
2. Vehicle Diagnostic Interface Diagram
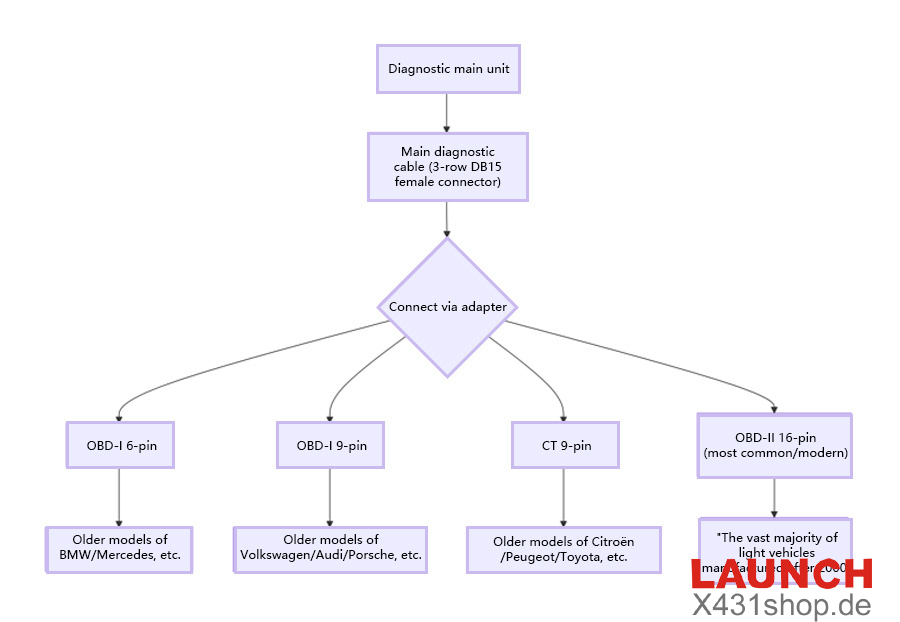
3. Connection Steps
1) Turn off the vehicle ignition and ensure safety.
2) Locate the vehicle’s DLC (usually under the steering column or driver-side dashboard).
3) Select and connect the appropriate adapter for the DLC type.
4) Attach the diagnostic cable to the DLC via the adapter.
5) Turn the ignition on (engine can be off or running) and power up the tool.
PART THREE: Performing Vehicle Diagnostics with Launch CR HD V21
1) Establish Connection: Connect the tool to the DLC and turn on the ignition – the device powers up automatically.
2) Access Main Menu: The system recognizes the vehicle and displays the main function screen.
3) Select Function: Choose options like reading fault codes, data logging, playback, or special features as needed.
4) Follow Instructions: Complete diagnostics by following the clear on-screen guidance – simple and intuitive.